1カメラ1GPUの時代は来るのか?クラウド上にライブストリーミングのAIフィルタを作ってみた。
こんにちは、テリーです。2023年後半、動画生成AIと関連技術・サービスが各社から新規リリースもしくは大幅改善されて出てきています。他にもたくさんありますが例えば下記があります。
- Stability AI: Stable Video Diffusion
- Meta: Emu Video
- Runway: Gen-2
- Pika labs: Pika
自社サイトのサービスとして利用されており、オープンでない技術がほとんどのようです。オープンソースのものは公開されるたびに動かしているのですが、最新の最高級デスクトップパソコンとGPU以外ではメモリ不足で動かないものが多く、気軽に試したいのに困ったものです。すぐに最新機種が出て世代交代するパソコンに60万円も出せないので、クラウドサービスに時間課金して使用しています。GPU付きのサーバは、GPUなしのVPSに比べるとかなり高いです。1時間100円〜は覚悟が必要です。それでも60万円のパソコンを100で割って、「6000時間使うまではお得、毎日8時間使っても730日(2年)」と割り切って、課金しています。値段が落ち着くまでは納得するしかありません。
今回は、クラウド上にGPUつきサーバを手配して、AI画像処理サーバを構築し、ライブ配信のAIフィルタとして使用するケースを想定したサンプルを紹介します。一部に有料サービスを含みます。
目次
対象読者
リアルタイムのAI画像処理をクラウドで実現したい人
リアルタイムのAI画像フィルタを使ってライブ配信したい人
動作確認環境
- クライアントPC
- macOS 13.5.2
- chrome 120.0.6099.71
- サーバ
- Ubuntu 22.04 LTS
- aiortc 1.6.0
- aiohttp 3.9.1
- nvidia-driver 545.29.06
AIフィルタとは?
LINEやTikTok、facebookにはスマホからライブ配信する際に、AIフィルタを選択する機能がついています。カメラの映像から顔を検出して、動物にキャラ変したり、化粧したり、マスクしたり、髪の色を変えたりなど、オリジナルの映像を元に何かしらの計算を加えて書き換えることをフィルタと呼びます。stable diffusionのベースとなっているdiffusersを使用した画像生成AIはこれまで1枚あたり10〜30秒程度かかっていたため、ライブ配信のフィルタには使用できませんでしたが、現在は10月に出てきたLCMやその他の改善で速度が数十倍速くなり、最新の速いGPUがあれば十分なフレームレートを出せるようになりました。そこでクラウドです。カメラの映像をクラウドに転送し、そこでGPUを使ったAIフィルタを通したものを送り返すことで、ミドルレンジのパソコンやスマホからでも最新AI技術を使った配信を実現することができます。
独自ドメインとSSL証明書を取得
WebRTCを使用するために、DNSが設定可能なドメインと、そのSSL証明書(TLS証明書)が必要です。本記事の趣旨から外れてしまうため、取得方法は省略させていただきます。noip.com と Let's Encrypt でそれぞれ無料で取得できます。本記事では、p2pcamera.hopto.org というドメインを取得し、fullchain.pem、privkey.pem というファイル名のSSL証明書が手元にある前提で進めます。p2pcamera.hopto.org という文字列を全て読者様のドメインに読み替えてください。
VPSサーバを起動・セットアップ
GPU付きのVPS(Virtual Private Server)を取得します。Google Compute Engine、Azure、AWSのどれでもよいです。その他のVPSサービスの場合はUDPポートが解放できるところにしましょう。HuggingFaceなどのPaaSでは、UDPポートが使用できないところが多いようです。1時間でおおよそ100円〜200円が相場のようです。
NVIDIAのドライバが古い場合は更新してください。本記事執筆時点で 545.29.06 が最新です。 こちらで最新バージョンを確認できます。バージョン違いで速度が全く違うので、できれば545以降をインストールしてください。ダウンロードおよびインストールには10分程度かかります。
TCPポート7860とUDPポート全てを外部からアクセス可能に設定してください。
起動したらサーバのIPアドレスをメモし、 p2pcamera.hopto.org のDNSにそのIPを設定します。1分ほど待ったら、pingでパケットの往復時間を調べます。
ping p2pcamera.hopto.org自宅のLANならば一桁台のミリ秒、インターネット上ならば二桁台のミリ秒でしょう。自宅とクラウドのデータセンターとの物理的な距離によって変わってきます。この数字は小さければ小さいほど映像の遅延が小さくなります。
ブラウザからHTTPS接続の確認
サーバにSSHで接続し、pythonのライブラリをインストールします。Webサーバに相当するaiohttp、WebRTCを処理するaiortc、AIを処理するライブラリをインストールします。この例ではPyTorch、Diffusersをインストールしています。専用サーバなのでvenvやcondaなどのpythonの仮想化は必要ありません。
sudo apt-get install -y python3-pip python3-opencvpip install aiortc aiohttp torch torchvision torchaudio diffusers["torch"] transformers次にホームディレクトリにフォルダを作成します。
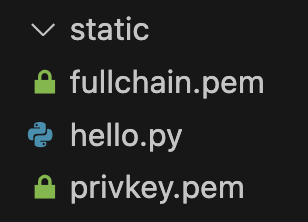
フォルダ名はプロジェクト名 p2pcamera とします。その直下にstaticというフォルダを作成します。p2pcameraフォルダはpythonのプログラムやSSL証明書など、ブラウザから直接アクセスできないファイルを置く場所。staticフォルダはブラウザからアクセスできるファイルを置く場所とします。
cd
mkdir p2pcamera
cd p2pcamera
mkdir static
VSCodeのRemote-SSHでこのサーバに接続し、p2pcameraフォルダを開きます。p2pcameraフォルダに下記のようにfullchain.pemとprivkey.pemファイルを置きます。
hello.py
1	import ssl
2	from aiohttp import web
3
4
5	async def index(request):
6	    content = "hello p2pcamera"
7	    return web.Response(content_type="text/html", text=content)
8
9
10	def main():
11	    cert_file = "fullchain.pem"
12	    key_file = "privkey.pem"
13	    ssl_context = ssl.SSLContext(protocol=ssl.PROTOCOL_TLS_SERVER)
14	    ssl_context.load_cert_chain(cert_file, key_file)
15
16	    app = web.Application()
17	    app.router.add_get("/", index)
18	    app.add_routes([web.static("/", "static", show_index=True)])
19
20	    web.run_app(
21	        app, access_log=None, host="0.0.0.0", port=7860, ssl_context=ssl_context
22	    )
23
24
25	if __name__ == "__main__":
26	    main()
pythonのプログラムを実行します。
python hello.pyhttpsサーバが立ち上がったかのようなメッセージが出ます。

ブラウザで https://p2pcamera.hopto.org:7860/ にアクセスします。このように表示された場合、SSL証明書が有効で、正常なHTTPS接続が確認できました。

SSL証明書とHTTPS接続はWebRTCの根幹で、つながらない場合はこれ以降の作業が無駄になります。ページが表示されない場合、DNSが間違っていないか、ポート7860を外部からアクセスできるようにオープンしているか、SSL証明書が正しいかを確認してください。
カメラの確認
次にWebカメラの映像をシンプルに画面に表示するページを用意します。static フォルダの下に index.html、index.js というファイル名で保存します。
index.html
1	<style>
2	    button {
3	        margin: 8px;
4	        padding: 8px 16px;
5	    }
6
7	    video {
8	        background-color: black;
9	    }
10	</style>
11	<div id="video-container">
12	    <video id="video" autoplay="true" playsinline="true" muted="true"></video>
13	</div>
14	<div>
15	    <button id="start" onclick="start()">Start</button>
16	    <button id="stop" style="display: none" onclick="stop()">Stop</button>
17	</div>
18	<script src="index.js"></script>
index.js
1	async function getDeviceId(deviceName) {
2	    const devices = await navigator.mediaDevices.enumerateDevices();
3	    device = devices.find((device) => device.label.includes(deviceName));
4	    return device?.deviceId;
5	}
6
7	async function start() {
8	    document.getElementById('start').style.display = 'none';
9	    document.getElementById('stop').style.display = 'inline-block';
10	    var constraints = {
11	        audio: true,
12	        video: { width: 640, height: 480 },
13	    };
14	    try {
15	        const deviceId = await getDeviceId('FaceTime');
16	        constraints.video.deviceId = deviceId;
17	    } catch (e) { }
18	    const stream = await navigator.mediaDevices.getUserMedia(constraints);
19	    document.getElementById('video').srcObject = stream;
20	}
21
22	function stop() {
23	    document.getElementById('stop').style.display = 'none';
24	    document.getElementById('start').style.display = 'inline-block';
25	    document.getElementById('video').srcObject?.getTracks().forEach(t => t.stop());
26	}
このjavascriptはブラウザでWebカメラの映像を表示する一般的なコードです。index.js 15行目でデバイス名に"FaceTime" を含むカメラを指定しています。他のカメラを指定する場合はこの行を修正します。ブラウザで https://p2pcamera.hopto.org:7860/index.html にアクセスします。
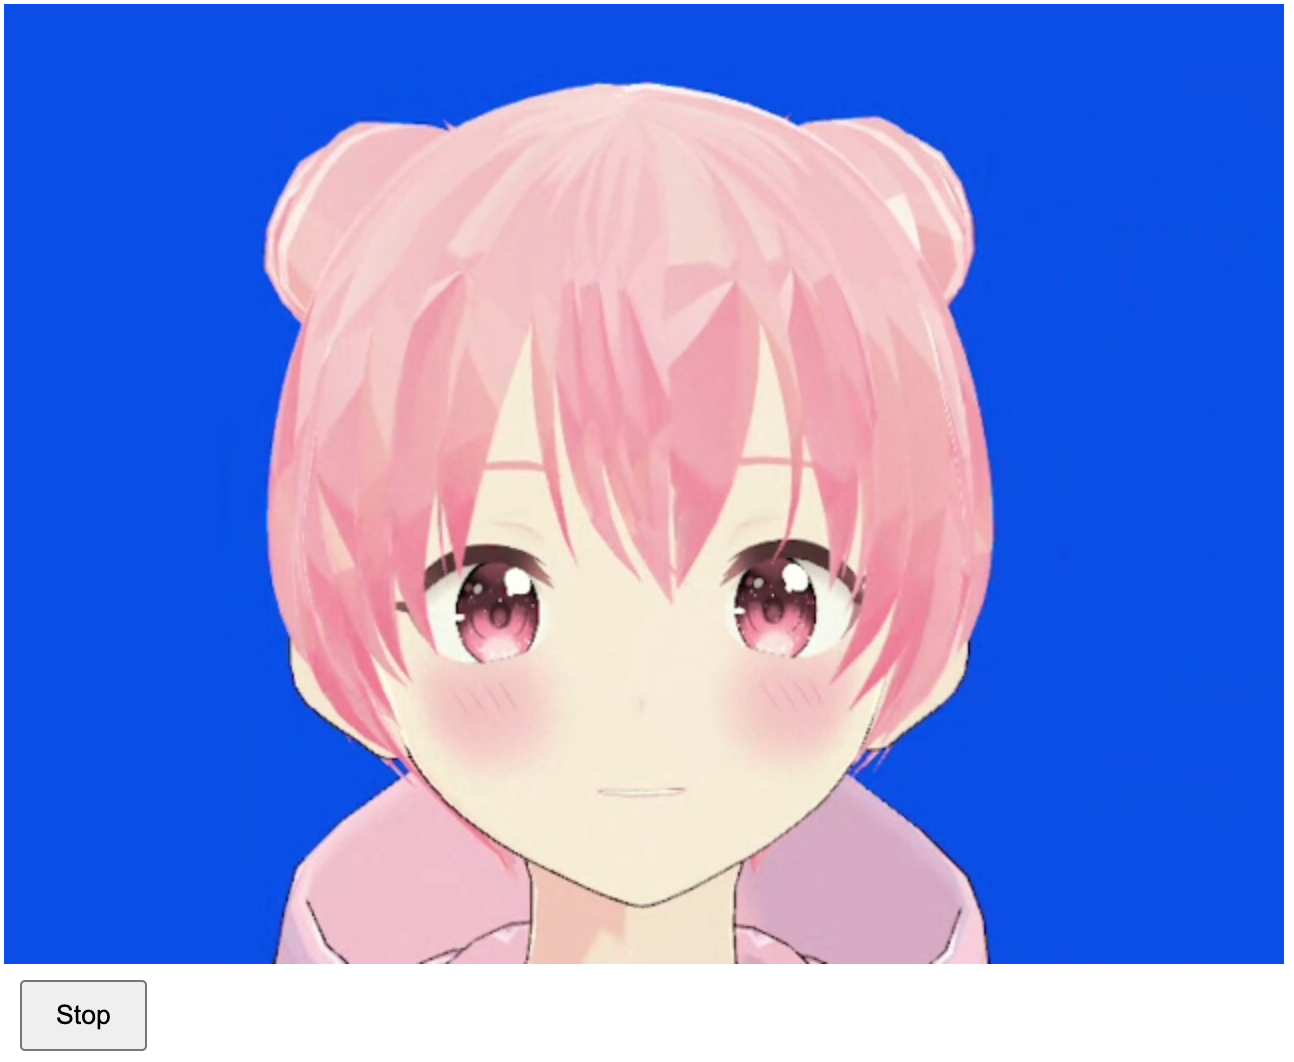
「Start」ボタンを押すと下図のようにカメラ映像が表示されます。「Stop」を押すと閉じます。

p2p接続の確認
次にWebRTCを使用するためのPythonプログラムをサーバに置きます。testp2p.py というファイル名にします。
testp2p.py
1	import asyncio, json, logging, ssl, uuid
2	from aiohttp import web
3	from aiortc import MediaStreamTrack, RTCPeerConnection, RTCSessionDescription
4	from av import VideoFrame
5
6	logger = logging.getLogger("pc")
7	pcs = set()
8
9
10	class VideoTransformTrack(MediaStreamTrack):
1	    kind = "video"
12
13	    def __init__(self, track, params):
14	        super().__init__()
15	        self.track = track
16	        self.params = params
17
18	    async def recv(self) -> VideoFrame:
19	        frame = await self.track.recv()
20	        return frame
21
22
23	async def offer(request):
24	    params = await request.json()
25	    offer = RTCSessionDescription(sdp=params["sdp"], type=params["type"])
26
27	    pc = RTCPeerConnection()
28	    pc_id = "PeerConnection(%s)" % uuid.uuid4()
29	    pcs.add(pc)
30
31	    def log_info(msg, *args):
32	        logger.info(pc_id + " " + msg, *args)
33
34	    log_info("Created for %s", request.remote)
35
36	    @pc.on("datachannel")
37	    def on_datachannel(channel):
38	        @channel.on("message")
39	        def on_message(message):
40	            if isinstance(message, str) and message.startswith("ping"):
41	                channel.send("pong" + message[4:])
42
43	    @pc.on("connectionstatechange")
44	    async def on_connectionstatechange():
45	        log_info("Connection state is %s", pc.connectionState)
46	        if pc.connectionState == "failed":
47	            await pc.close()
48	            pcs.discard(pc)
49
50	    @pc.on("track")
51	    def on_track(track):
52	        log_info("Track %s received", track.kind)
53
54	        if track.kind == "video":
55	            pc.addTrack(VideoTransformTrack(track, params))
56
57	        @track.on("ended")
58	        async def on_ended():
59	            log_info("Track %s ended", track.kind)
60
61	    await pc.setRemoteDescription(offer)
62	    answer = await pc.createAnswer()
63	    await pc.setLocalDescription(answer)
64
65	    return web.Response(
66	        content_type="application/json",
67	        text=json.dumps(
68	            {"sdp": pc.localDescription.sdp, "type": pc.localDescription.type}
69	        ),
70	    )
71
72
73	async def index(request):
74	    return web.HTTPFound("/index.html")
75
76
77	async def on_shutdown(app):
78	    coros = [pc.close() for pc in pcs]
79	    await asyncio.gather(*coros)
80	    pcs.clear()
81
82
83	def main():
84	    logging.basicConfig(level=logging.INFO)
85
86	    cert_file = "fullchain.pem"
87	    key_file = "privkey.pem"
88	    ssl_context = ssl.SSLContext(protocol=ssl.PROTOCOL_TLS_SERVER)
89	    ssl_context.load_cert_chain(cert_file, key_file)
90
91	    app = web.Application()
92	    app.router.add_get("/", index)
93	    app.router.add_post("/offer", offer)
94	    app.add_routes([web.static("/", "static", show_index=True)])
95
96	    web.run_app(
97	        app, access_log=None, host="0.0.0.0", port=7860, ssl_context=ssl_context
98	    )
99
100
101	if __name__ == "__main__":
102	    main()
ブラウザ向けのファイルとしてstaticフォルダに p2pcamera.js というファイルを作成します。
p2pcamera.js
1	navigator.mediaDevices.originalGetUserMedia = navigator.mediaDevices.getUserMedia;
2	navigator.mediaDevices.getUserMedia = async (constraints) => {
3	    const stream = await navigator.mediaDevices.originalGetUserMedia(constraints);
4	    const vt = stream.getVideoTracks()
5	    if (vt.length) {
6	        const originalVideoTrack = vt[0];
7	        const pc = new RTCPeerConnection();
8	        const videoTrackPromise = new Promise((resolve, reject) => {
9	            pc.addEventListener('track', (evt) => {
10	                if (evt.track.kind == 'video') {
11	                    resolve(evt.track);
12	                }
13	            });
14	        });
15
16	        pc.addTransceiver(originalVideoTrack, stream);
17	        offer = await pc.createOffer();
18	        pc.setLocalDescription(offer);
19	        response = await fetch('https://p2pcamera.hopto.org:7860/offer', {
20	            body: JSON.stringify({
21	                sdp: offer.sdp,
22	                type: offer.type,
23	            }),
24	            headers: { 'Content-Type': 'application/json' },
25	            method: 'POST'
26	        });
27	        answer = await response.json();
28	        await pc.setRemoteDescription(answer);
29	        const newVideoTrack = await videoTrackPromise;
30	        newVideoTrack._stop = newVideoTrack.stop;
31	        newVideoTrack.stop = () => {
32	            newVideoTrack._stop();
33	            pc.getTransceivers()?.forEach(t => { try { t.stop?.() } catch (e) { } });
34	            pc.getSenders().forEach(s => s.track.stop());
35	            setTimeout(() => { pc.close(); }, 500);
36	        }
37	        stream.removeTrack(originalVideoTrack);
38	        stream.addTrack(newVideoTrack);
39	    }
40	    return stream;
41	};
index.html から p2pcamera.js を読み込むように、index.html の末尾に追記します。
19 <script src="p2pcamera.js"></script>以上の準備ができたら testp2p.py を実行し、ブラウザで https://p2pcamera.hopto.org:7860/index.html にアクセスして、startボタンを押します。
python testp2p.pystartボタンを押した時に若干画質が落ちているのが分かるでしょうか? ブラウザとVPSをp2pで接続し、カメラの映像をVPSにストリーミングし、何も加工せずにそのまま送り返したものを表示しています。表示されない場合はブラウザのconsoleを確認してください。
カメラに時計等を表示し、遅延時間を計測することができます。こちらの環境だと0.2秒程度です。
AIフィルタの実装と確認
VPSには yuv420p のフレームが順に届きます。それをAIやOpenCV等の画像処理を加えて送り返しますが、到着する動画のフレーム間隔よりも、画像処理が遅いことがよくあります。ライブ配信の場合は、届いたフレームを全て順に処理するのではなく、キューに貯めて、古くなったものを破棄する行程が必要です。また、AIフィルタは重たい処理なので、マルチプロセスにして、WebRTCの処理に影響が出にくいようにします。それによりp2pもAI処理もそれぞれの持つ最高速度を実現できます。
AI処理のプロセス用の関数を別のPythonスクリプトにします。本記事では、例として detectron2のDensePose を使います。人間の体をセグメンテーションして色付けします。
下記のコマンドをVPS上で実行し、必要なライブラリをインストールします。
pip install
 'git+https://github.com/facebookresearch/detectron2@main#subdirectory=projects/DensePose'
git clone https://github.com/facebookresearch/detectron2
p2pで受け取った画像フレームをDensePoseして送り返すPythonスクリプト sub_densepose.pyを作成します。
sub_densepose.py
1	import torch
2	from time import time
3	import numpy as np
4	from queue import Empty
5	from torch.multiprocessing import Queue, RawValue
6
7	from detectron2.config import get_cfg
8	import torch
9	import cv2
10	import numpy as np
11	from detectron2.engine import DefaultPredictor
12	from densepose import add_densepose_config
13	from densepose.vis.extractor import DensePoseResultExtractor
14	from densepose.vis.densepose_results import (
15	    DensePoseResultsFineSegmentationVisualizer as Visualizer,
16	)
17
18	app_starttime = time()
19
20
21	def atime(basetime):
22	    return int((time() - basetime) * 1000)
23
24
25	def aprint(*args):
26	    print(f"{atime(app_starttime):,}:", *args)
27
28
29	def sub_main(input_queue: Queue, output_queue: Queue, processed_count: RawValue):
30	    cfg = get_cfg()
31	    add_densepose_config(cfg)
32	    cfg.merge_from_file(
33	        "detectron2/projects/DensePose/configs/densepose_rcnn_R_50_FPN_s1x.yaml"
34	    )
35	    cfg.MODEL.WEIGHTS = "https://dl.fbaipublicfiles.com/densepose/densepose_rcnn_R_50_FPN_s1x/165712039/model_final_162be9.pkl"
36	    predictor = DefaultPredictor(cfg)
37
38	    firsttime = None
39	    while True:
40	        try:
41	            image = input_queue.get()
42	        except Empty:
43	            continue
44	        start = time()
45	        if processed_count.value <= 1:
46	            firsttime = time()
47
48	        height, width = image.height, image.width
49	        image = np.asarray(image)[:, :, ::-1]
50
51	        with torch.no_grad():
52	            outputs = predictor(image)["instances"]
53
54	        results = DensePoseResultExtractor()(outputs)
55	        cmap = cv2.COLORMAP_VIRIDIS
56	        arr = cv2.applyColorMap(np.zeros((height, width), dtype=np.uint8), cmap)
57	        result = Visualizer(alpha=1, cmap=cmap).visualize(arr, results)[:, :, ::-1]
58
59	        processed_count.value += 1
60	        count = processed_count.value
61	        fps = (count - 1) / (time() - firsttime)
62	        aprint(f"{count}, {atime(start):,}ms, {fps:.2f}fps")
63	        output_queue.put(result)
この関数 sub_mainはWebRTCのプロセスと別のプロセスで実行されているため、呼び出し元のプロセスと変数の共有はできません。引数に受け取った input_queue、output_queue、processed_count の3変数だけが、双方のプロセスからアクセスできる特別な変数です。
次に testp2p.py を改良し、AI処理のプロセス起動と、p2pで受け取ったフレームをAI処理に投げる処理を追加します。ファイル名を p2pcamera.py とします。
p2pcamera.py
1	import asyncio, json, logging, ssl, uuid
2	from aiohttp import web
3	from aiortc import MediaStreamTrack, RTCPeerConnection, RTCSessionDescription
4	from av import VideoFrame
5	import numpy as np
6	from queue import Empty
7	from torch.multiprocessing import Process, Queue, RawValue, set_start_method
8
9	try:
10	    set_start_method("spawn")
1	except RuntimeError:
12	    pass
13
14	ai_process = None
15	input_queue = Queue()
16	output_queue = Queue()
17	processed_count = RawValue("i", 0)
18
19
20	def push_pop(frame):
21	    try:
22	        while not input_queue.empty():
23	            input_queue.get_nowait()
24	    except Empty:
25	        pass
26	    input_queue.put(frame.to_image())
27	    try:
28	        return output_queue.get_nowait()
29	    except Empty:
30	        return None
31
32
33	logger = logging.getLogger("pc")
34	pcs = set()
35
36
37	class VideoTransformTrack(MediaStreamTrack):
38	    kind = "video"
39
40	    def __init__(self, track, params):
41	        super().__init__()
42	        self.track = track
43	        self.params = params
44	        processed_count.value = 0
45	        while not input_queue.empty():
46	            input_queue.get_nowait()
47	        img = np.zeros((256, 256, 3), dtype=np.uint8)
48	        self.last_img = VideoFrame.from_ndarray(img, format="rgb24")
49
50	    async def recv(self) -> VideoFrame:
51	        frame = await self.track.recv()
52	        img = push_pop(frame)
53
54	        if img is None:
55	            new_frame = self.last_img
56	            new_frame.pts = frame.pts
57	            new_frame.time_base = frame.time_base
58	            return new_frame
59
60	        new_frame = VideoFrame.from_ndarray(img, format="rgb24")
61	        new_frame.pts = frame.pts
62	        new_frame.time_base = frame.time_base
63	        self.last_img = new_frame
64	        return new_frame
65
66
67	async def offer(request):
68	    params = await request.json()
69	    offer = RTCSessionDescription(sdp=params["sdp"], type=params["type"])
70
71	    pc = RTCPeerConnection()
72	    pc_id = "PeerConnection(%s)" % uuid.uuid4()
73	    pcs.add(pc)
74
75	    def log_info(msg, *args):
76	        logger.info(pc_id + " " + msg, *args)
77
78	    log_info("Created for %s", request.remote)
79
80	    @pc.on("datachannel")
81	    def on_datachannel(channel):
82	        @channel.on("message")
83	        def on_message(message):
84	            if isinstance(message, str) and message.startswith("ping"):
85	                channel.send("pong" + message[4:])
86
87	    @pc.on("connectionstatechange")
88	    async def on_connectionstatechange():
89	        log_info("Connection state is %s", pc.connectionState)
90	        if pc.connectionState == "failed":
91	            await pc.close()
92	            pcs.discard(pc)
93
94	    @pc.on("track")
95	    def on_track(track):
96	        log_info("Track %s received", track.kind)
97
98	        if track.kind == "video":
99	            pc.addTrack(VideoTransformTrack(track, params))
100
101	        @track.on("ended")
102	        async def on_ended():
103	            log_info("Track %s ended", track.kind)
104
105	    await pc.setRemoteDescription(offer)
106	    answer = await pc.createAnswer()
107	    await pc.setLocalDescription(answer)
108
109	    return web.Response(
10	        content_type="application/json",
11	        text=json.dumps(
12	            {"sdp": pc.localDescription.sdp, "type": pc.localDescription.type}
13	        ),
14	    )
15
16
17	async def index(request):
18	    return web.HTTPFound("/index.html")
19
120
121	async def on_shutdown(app):
122	    coros = [pc.close() for pc in pcs]
123	    await asyncio.gather(*coros)
124	    pcs.clear()
125
126
127	@web.middleware
128	async def cors_middleware(request, handler):
129	    headers = {
130	        "Access-Control-Allow-Headers": "*",
131	        "Access-Control-Allow-Methods": "*",
132	        "Access-Control-Allow-Origin": "*",
133	    }
134	    if request.method == "OPTIONS":
135	        return web.Response(headers=headers)
136	    try:
137	        response = await handler(request)
138	        for key, value in headers.items():
139	            response.headers[key] = value
140	        return response
141	    except web.HTTPException as e:
142	        for key, value in headers.items():
143	            e.headers[key] = value
144	        raise e
145
146
147	def main():
148	    from sub_densepose import sub_main
149
150	    global ai_process
151	    ai_process = Process(
152	        target=sub_main, args=(input_queue, output_queue, processed_count), daemon=True
153	    )
154	    ai_process.start()
155	    logging.basicConfig(level=logging.INFO)
156
157	    cert_file = "fullchain.pem"
158	    key_file = "privkey.pem"
159	    ssl_context = ssl.SSLContext(protocol=ssl.PROTOCOL_TLS_SERVER)
160	    ssl_context.load_cert_chain(cert_file, key_file)
161
162	    app = web.Application(middlewares=[cors_middleware])
163	    app.on_shutdown.append(on_shutdown)
164	    app.router.add_get("/", index)
165	    app.router.add_post("/offer", offer)
166	    app.add_routes([web.static("/", "static", show_index=True)])
167
168	    web.run_app(
169	        app, access_log=None, host="0.0.0.0", port=7860, ssl_context=ssl_context
170	    )
171
172
173	if __name__ == "__main__":
174	    main()
以上の準備ができたら p2pcamera.py を実行し、ブラウザで https://p2pcamera.hopto.org:7860/index.html にアクセスして、startボタンを押します。
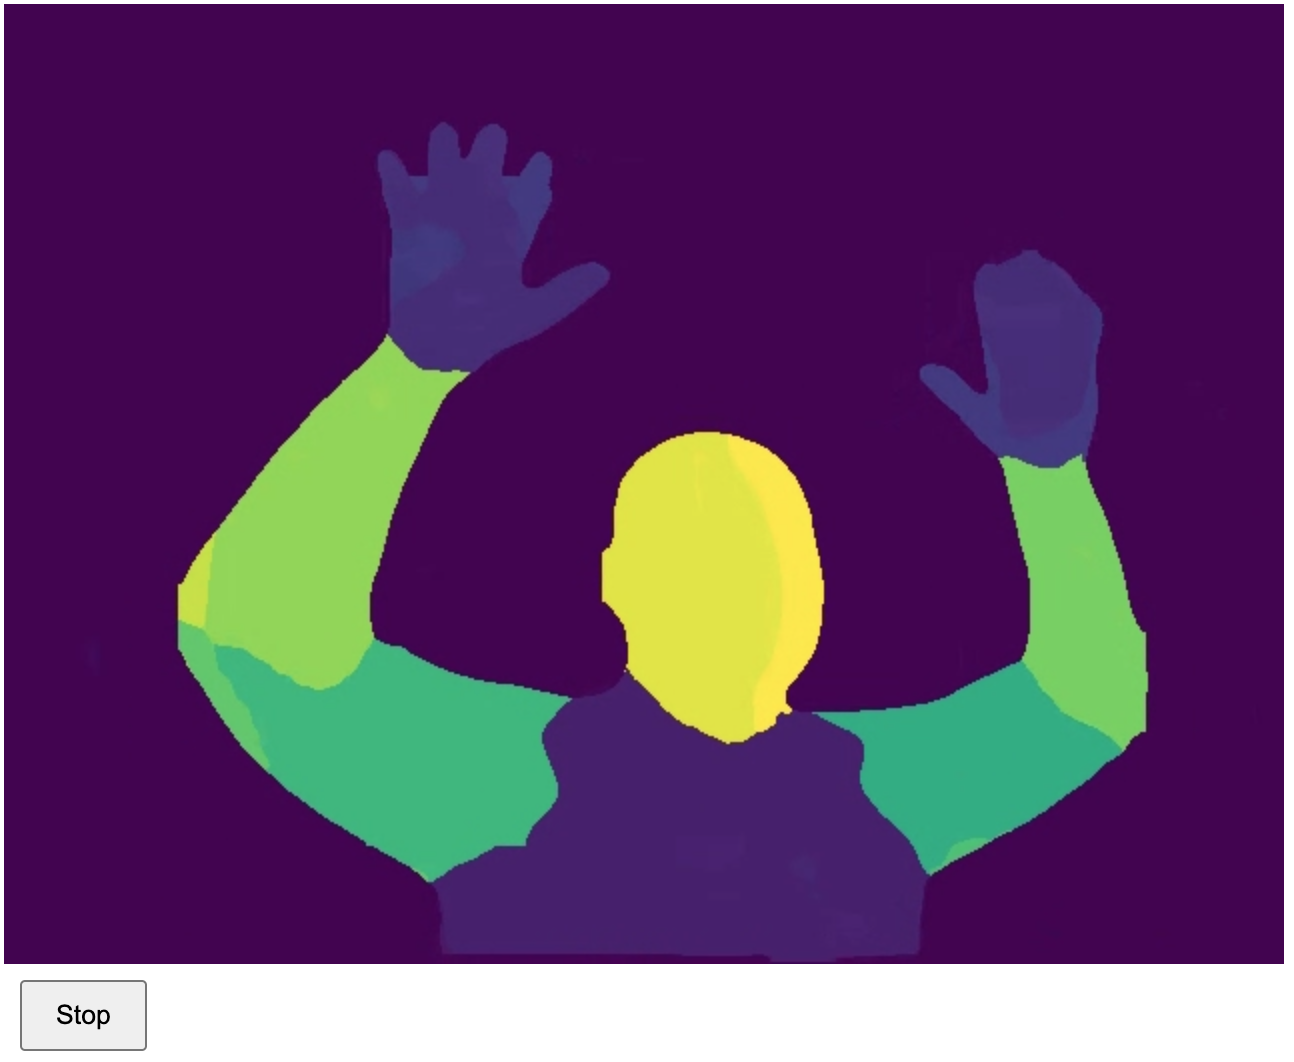
python p2pcamera.py1回目の起動時は関連するモデルファイルを大量にダウンロードするため数分待たされますが、2回目以降はキャッシュされるのであまり待たずに起動できます。
さて、これまでのカメラ映像と違うものが出てきたでしょうか?フレームレートも明らかに遅くなっていることでしょう。こちらの環境だと11fps程度です。先ほどより0.1秒程度遅延していることにも気づきます。先ほどと比較して増えたのがAI画像処理の時間です。
ビデオ会議サイトへの再配信
AIフィルタを通した映像が手に入ったところで、それを別のビデオ会議サイトに配信してみましょう。ブラウザ側のスクリプト index.js をよく見てください。getUserMediaを呼んでいるだけです。p2p接続してAIフィルタをかける処理は完全に裏方処理として隠蔽されているので、ビデオ会議サイトへの映像配信のプログラムは従来のWebカメラやUSBカメラの配信と何一つ変更する必要がありません。p2pcamera.js を配信用のWebページに<script>タグで読み込むだけで、AIフィルタが適用されます。
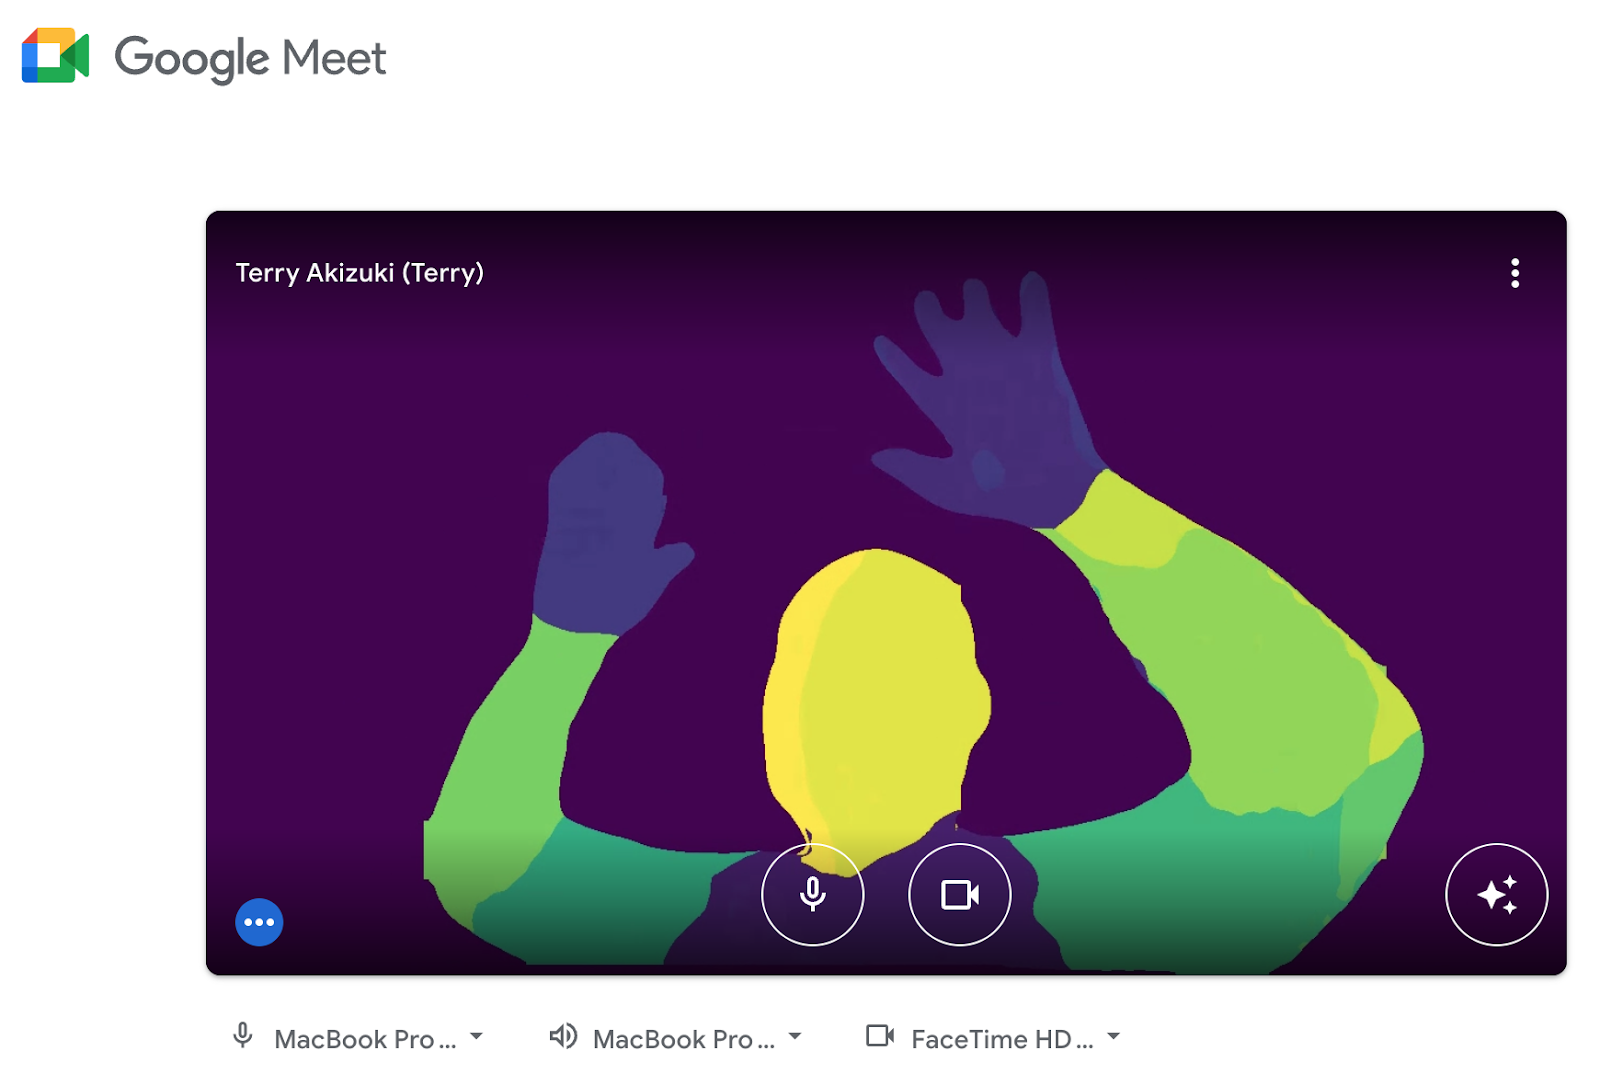
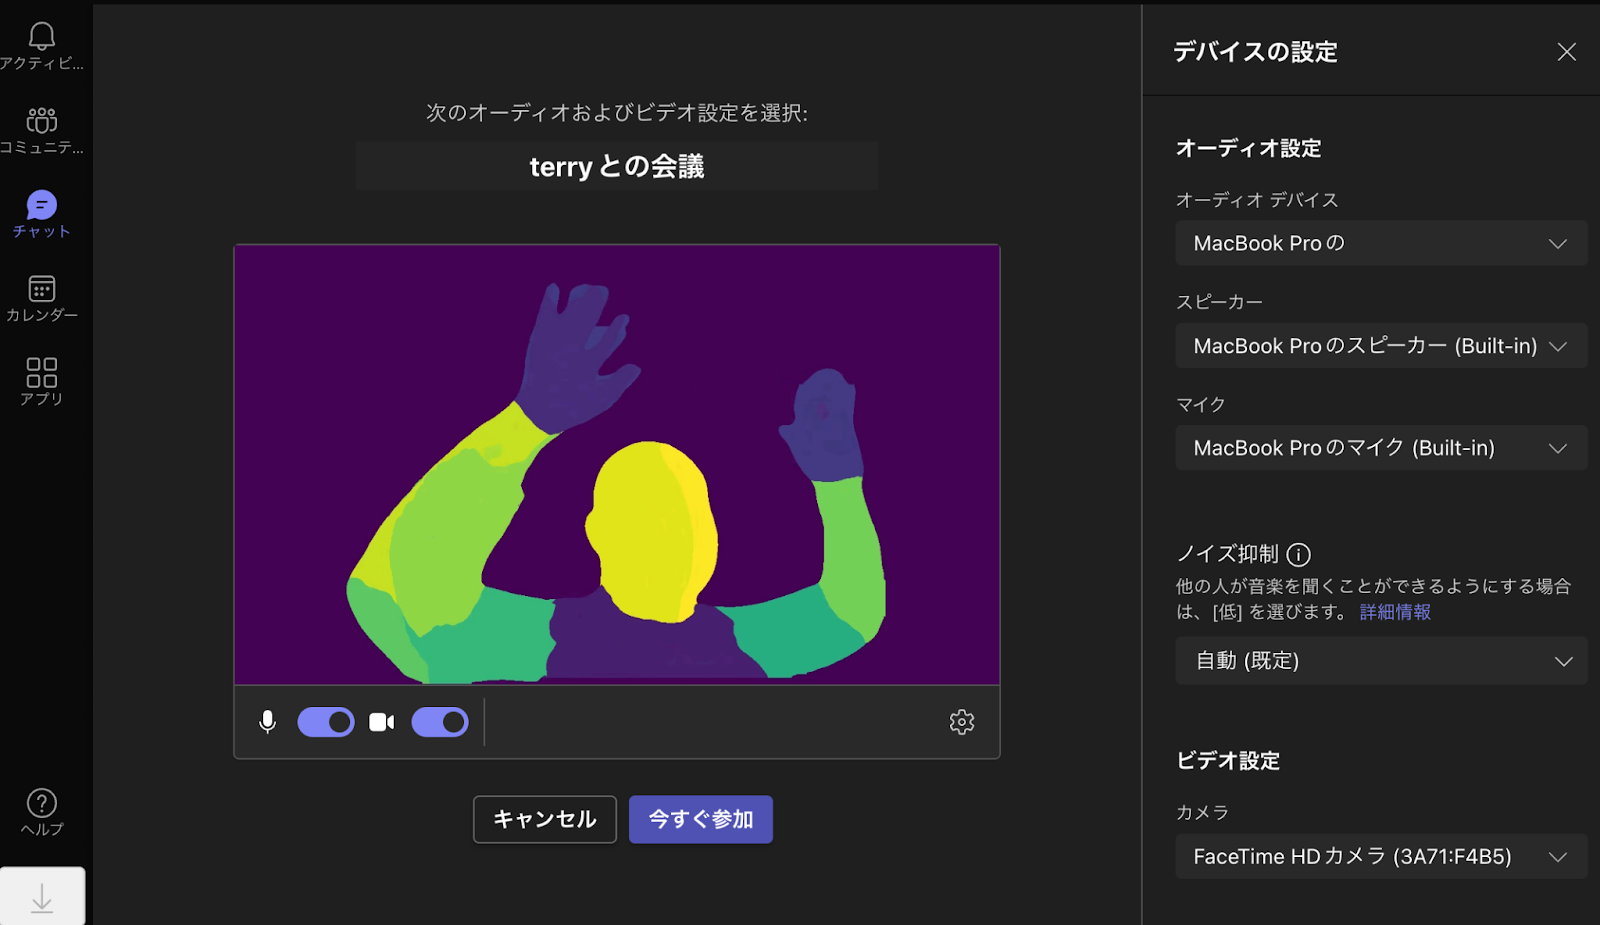
ImageFlux Live Streamingのように配信のWebページを自社で実装し、直接修正できる場合は<script>タグを1行追加するだけです。一方、他社サービスのビデオ会議サイトにはスクリプトを追加することはできないので、Chrome拡張を使って挿入します。Chrome拡張の書き方については話が長くなるため、別記事としますが、p2pcamera.js は上で紹介したものから変更がありません。
下図はChrome拡張を使ってp2pcamera.jsをGoogle Meetに読み込ませた例です。
下図はChrome拡張を使ってp2pcamera.jsをMicrosoft Teamsに読み込ませた例です。
まとめ
ブラウザからp2pでクラウドのVPSサーバに映像を転送し、AIフィルタを通した映像を別サイトに再配信するサンプルを紹介しました。セグメンテーションや物体検出、顔検出、その他AIが得意とする処理をクラウド上で実現できます。カメラごとに1台ずつサーバを用意するのがコスト面で大変ですが、1時間100円の維持費がまかなえるようなサービスで今後採用が出てくると思います。GPUの価格も徐々に下がっていくでしょう。diffusersを使ったi2iのAIフィルタも、OpenPoseのAIフィルタも、あらゆるAIフィルタが本記事で紹介したものとほぼ同等のコードで実現可能です。ぜひ挑戦してください。ご質問、ご感想もお待ちしています。